Jira setup
Create the Work Type field and add it to screens
1
Install as an admin
Log in to Jira with administrator rights.
Go to (top-right) → Work Items under admin settings, then choose Fields.
- Click Create new field.
- Select Select List (single choice) as the field type.
- Name it Work Type.

2
Add the Work Type values
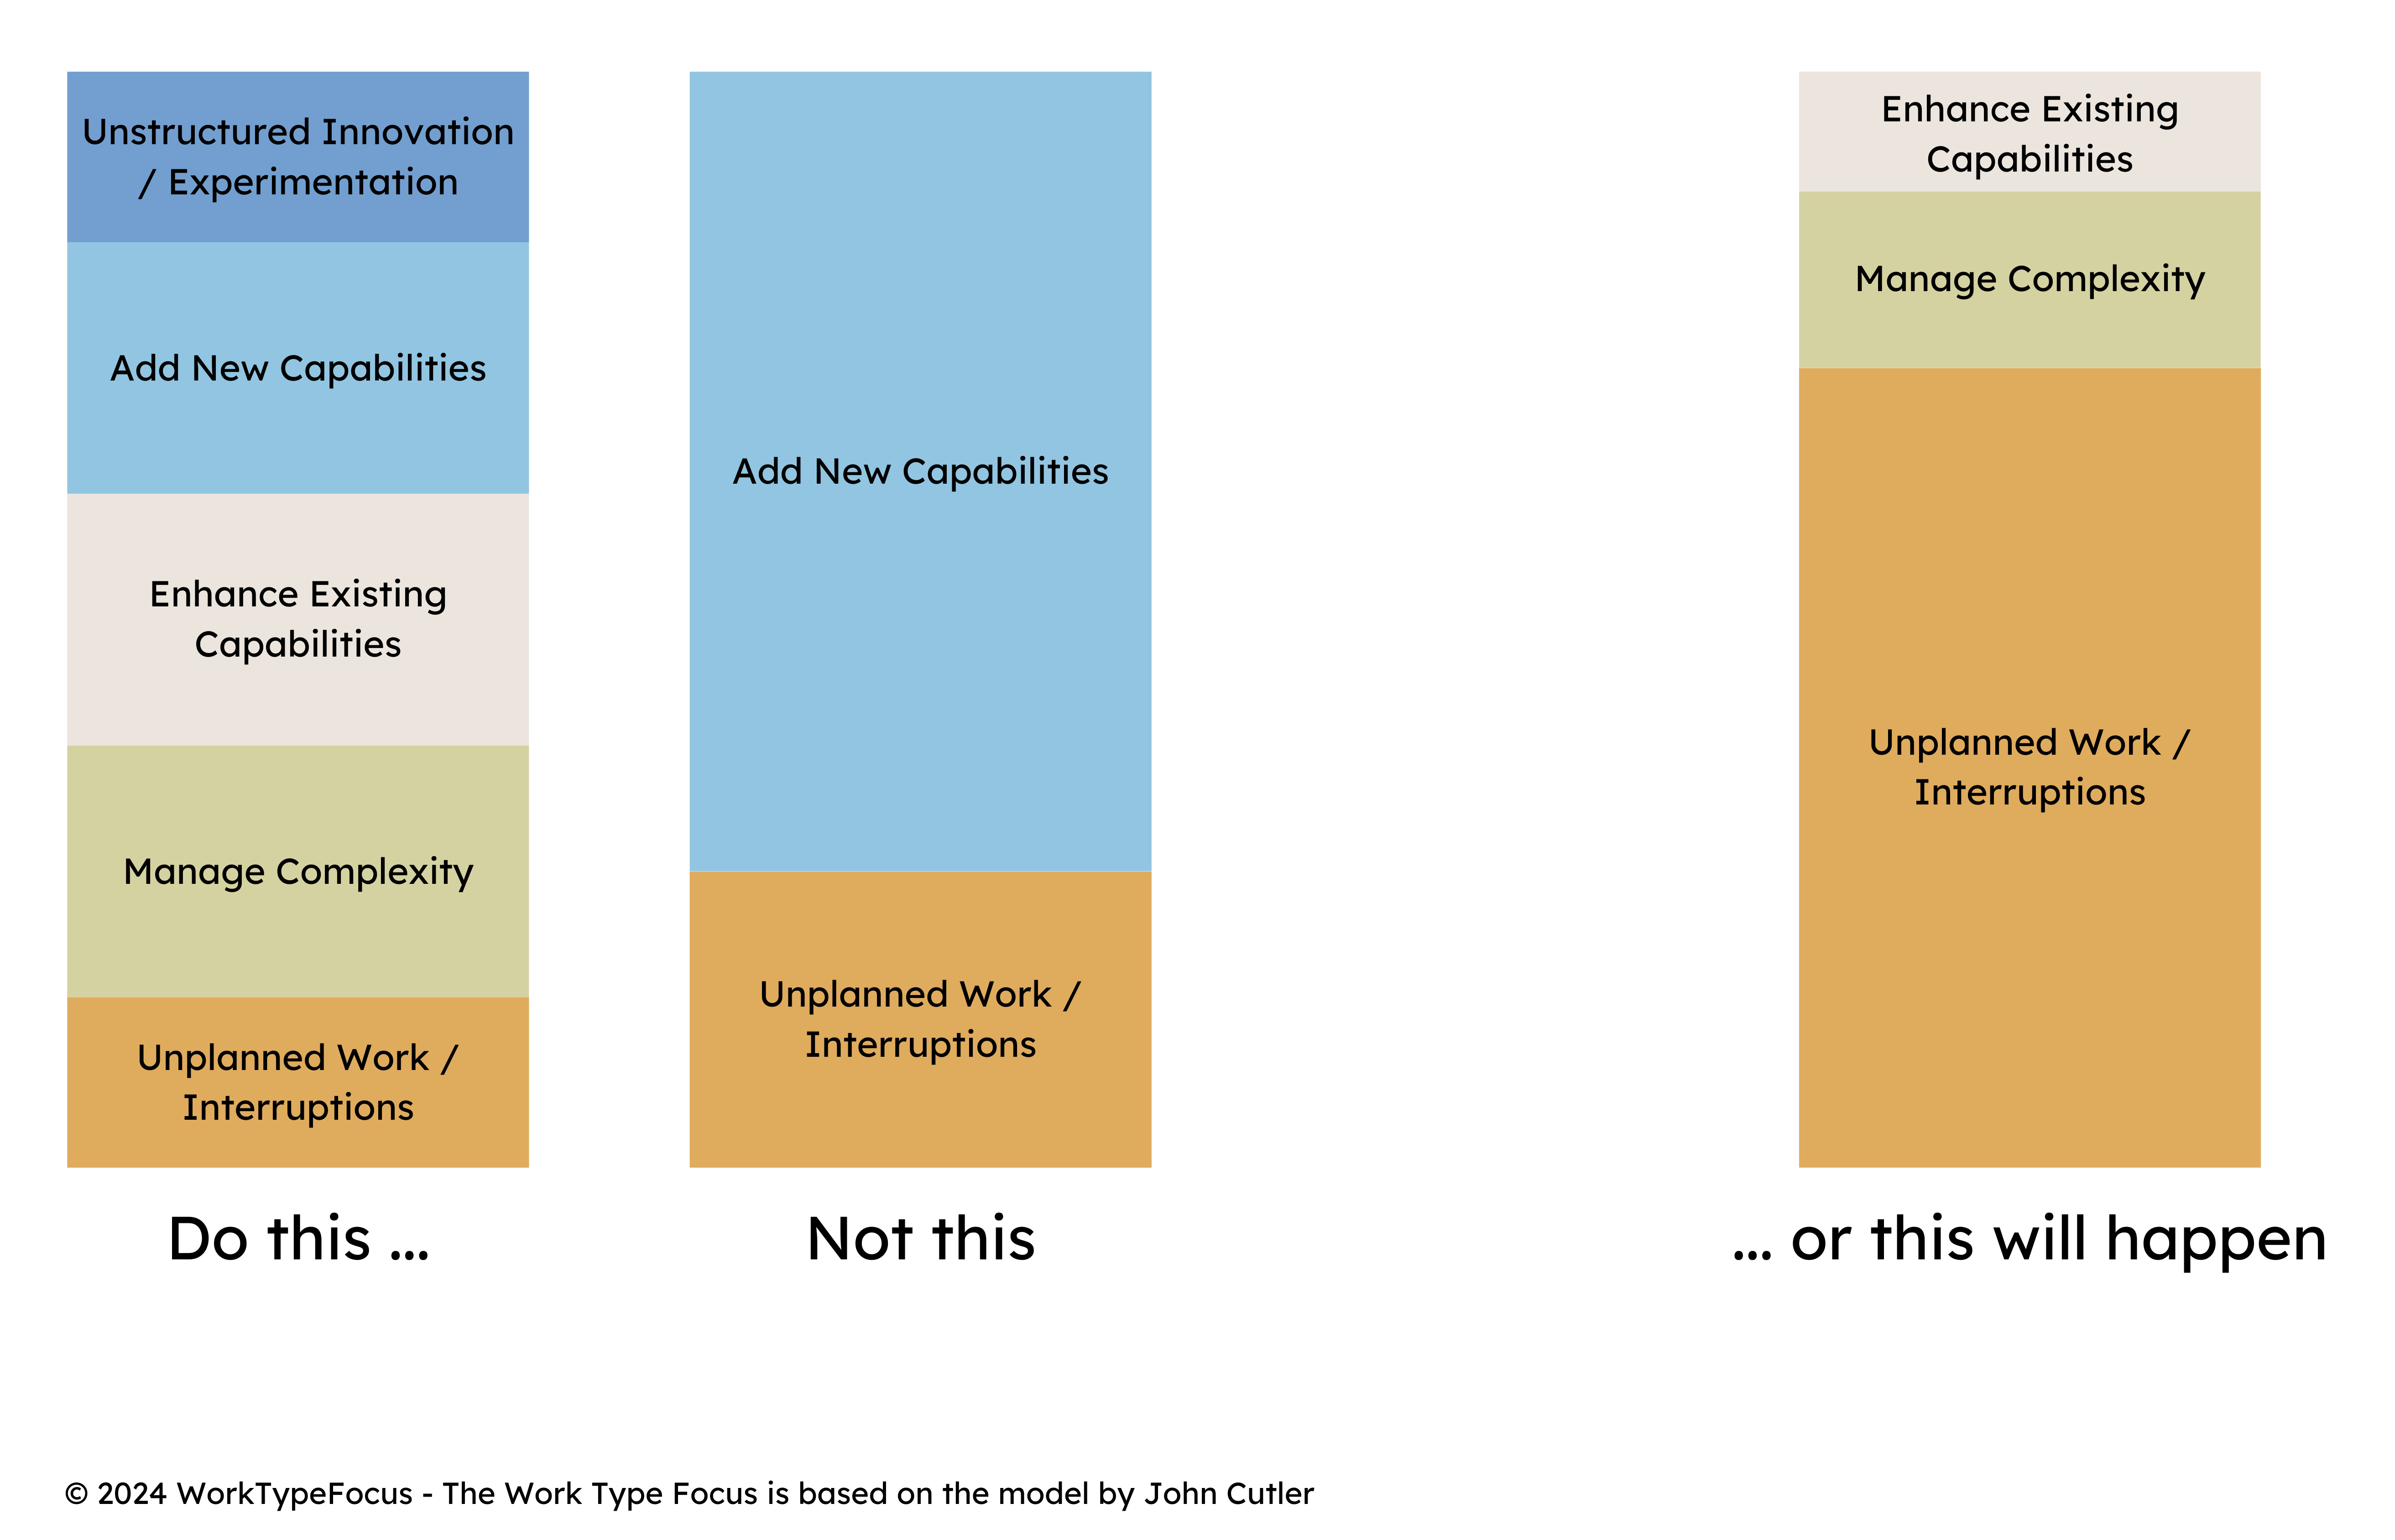
Use these exact options to mirror the model:
- Unplanned Work / Interruptions
- Manage Complexity
- Enhance Existing Capabilities
- Add New Capabilities
- Unstructured Innovation / Experimentation
Click Create to save the custom field.

3
Add the field to screens
Make sure Work Type is visible whenever issues are created or edited.
Go to Screens under the Screens section.
- Add Work Type to the Default Screen for broad coverage, or
- Add it to the specific screens your projects use.
Tip: make the field mandatory so every issue is categorized.

Classify & track
Use Work Type Focus on your board
4
Classify every issue
On your project board, ensure each issue has a Work Type selected.
If the Work Type Focus app is not visible, use the + button to add it to your overview.
View all-time data or filter by time ranges and sprints for detailed insights.

Need help rolling this out?
We can review your work mix targets, tune the categories, and get dashboards ready for leadership.